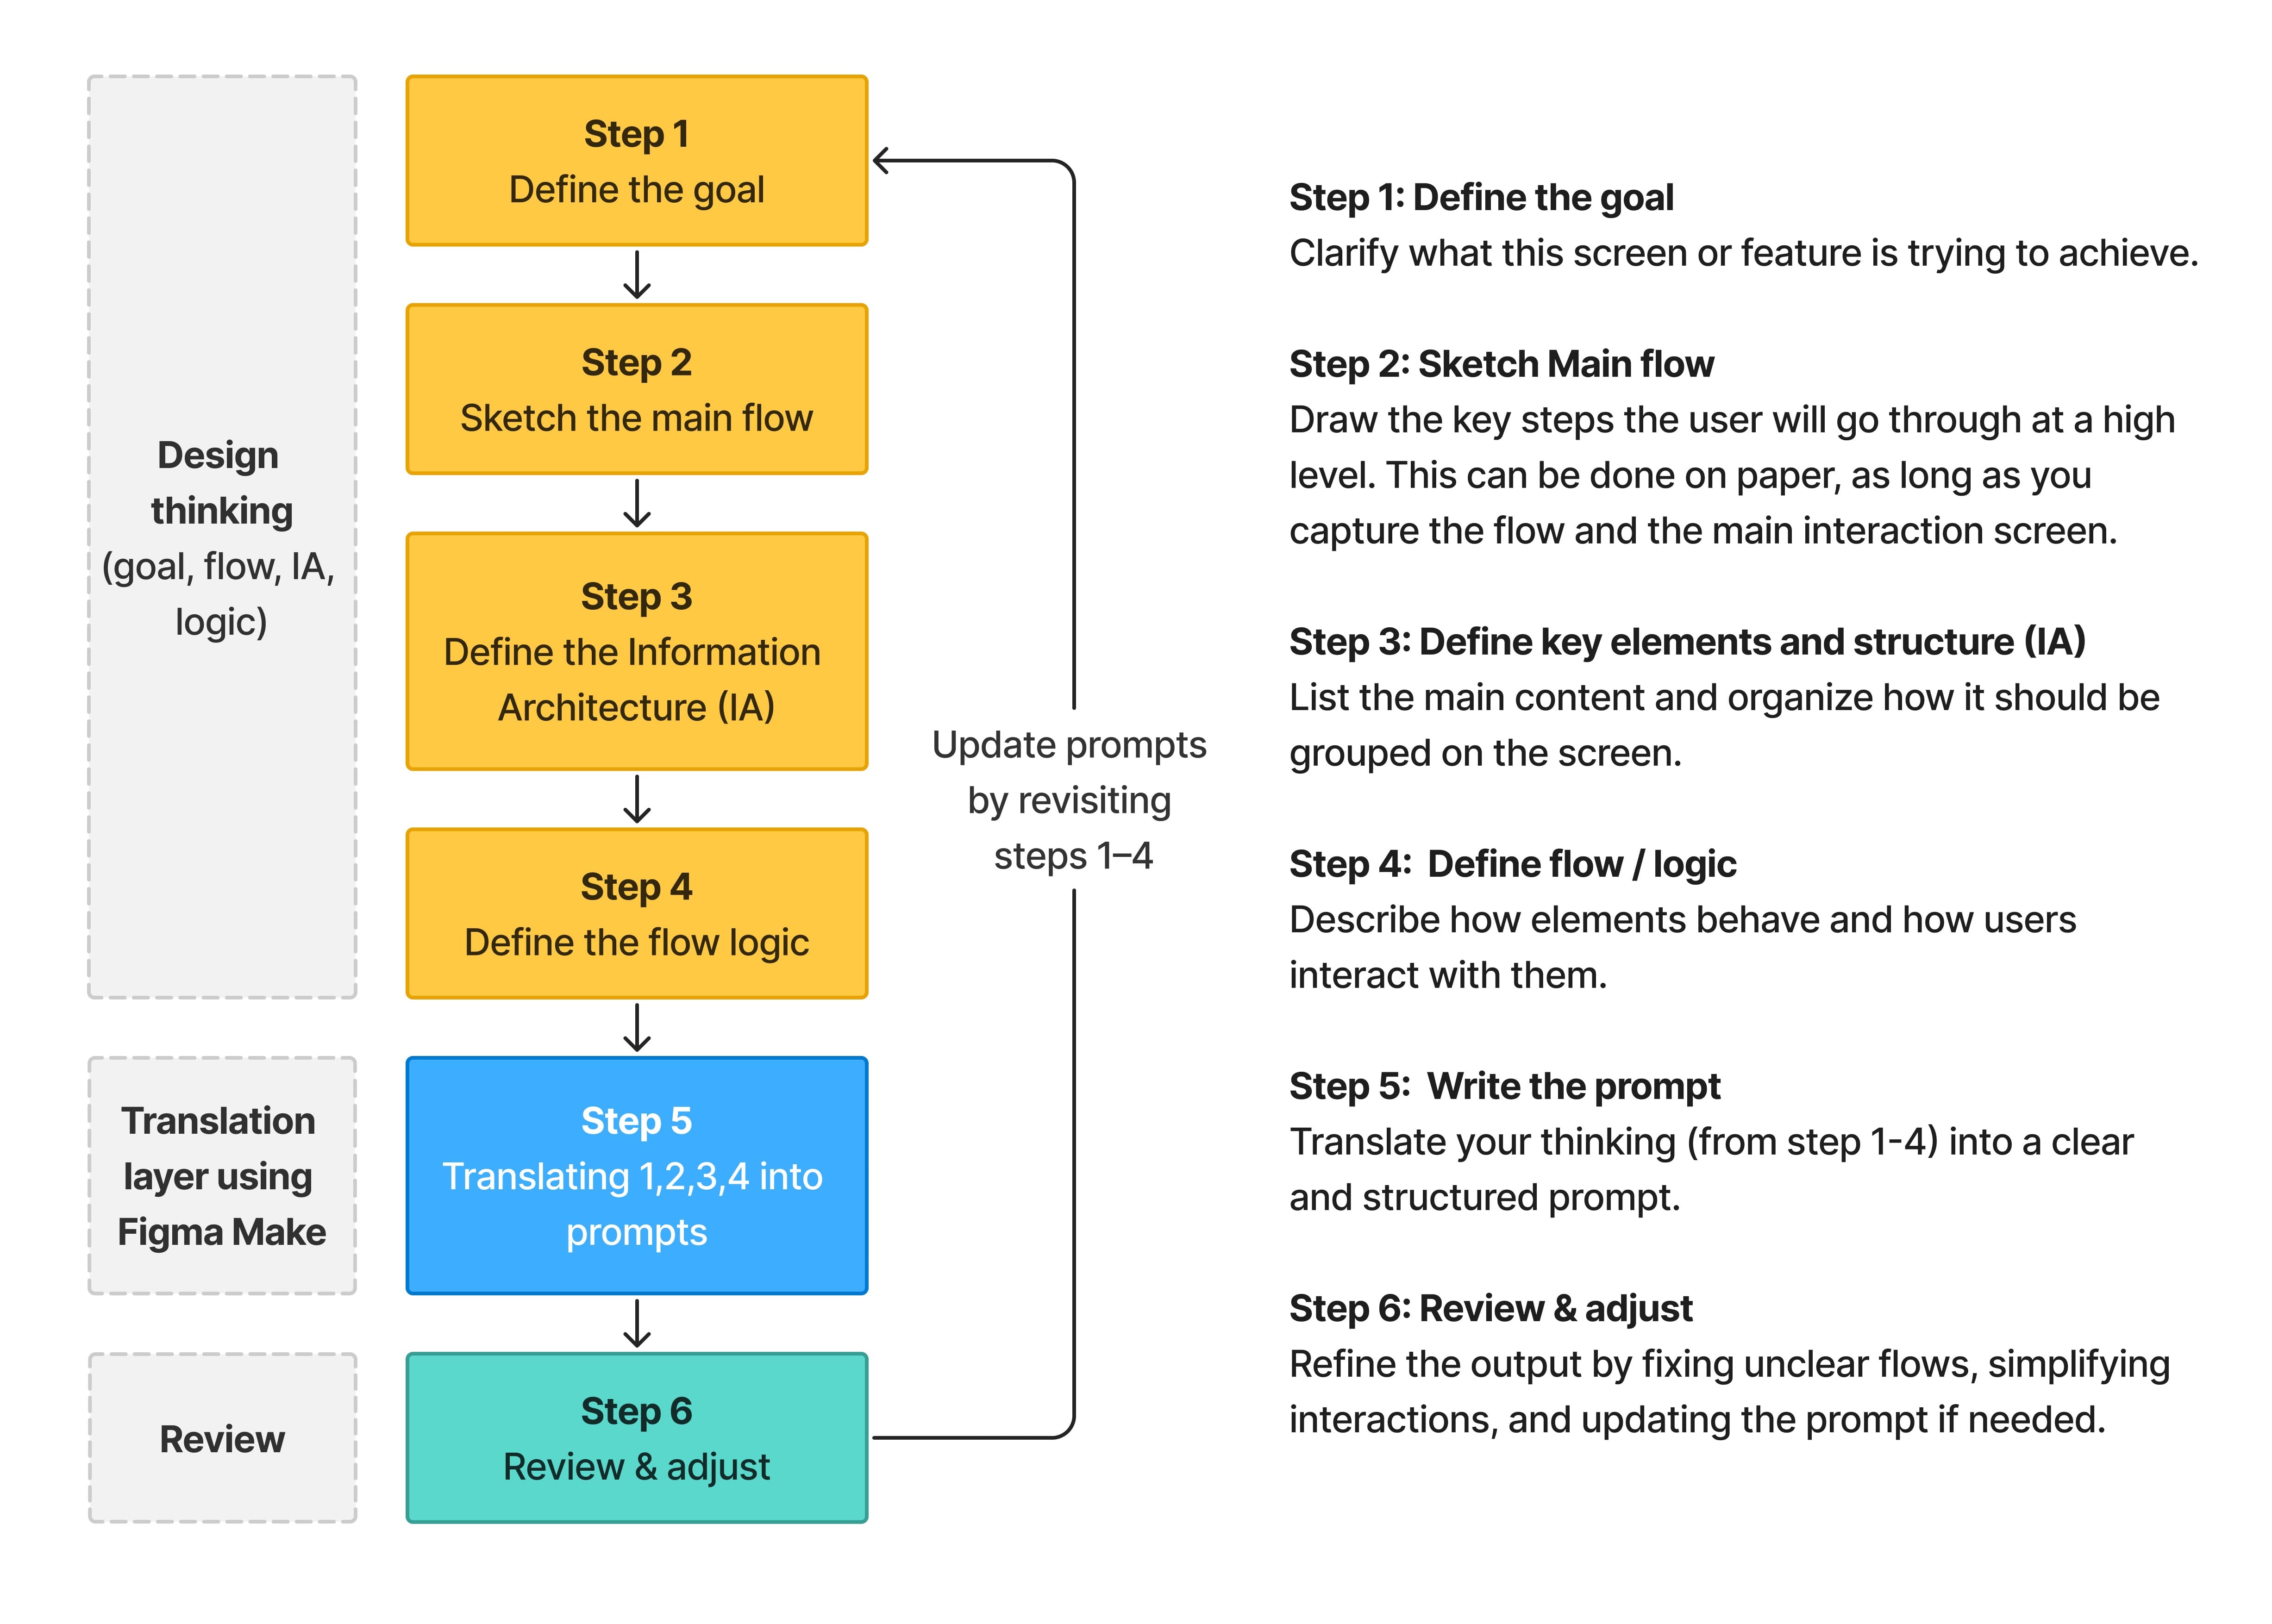
Figma Make: Design Process

  • March 24, 2026
  • AI Playground
  •                    

Figma Make: Design Process

In early 2025, I started using Figma Make to prototype features for a Zoo Management Platform. It’s a tool for managing animal care, events, and information.

At first, it was slower than expected. The results were inconsistent, and I kept rewriting prompts trying to get it right. It felt more like guessing than designing.

I realized I was jumping into prompts without clearly defining what I wanted to build. So I started outlining the structure, content, and logic first, then writing the prompt. The results became more consistent, and I felt more in control.

That’s when I developed a simple thinking process I now use before writing any prompt in Figma Make or other generative AI tools. It’s not about better prompts. It’s about applying design thinking before using AI.

My Design Process with Figma Make
A quick example

Let’s look at a quick example with this feature called Zoo Life Directory. It’s a tool for creating animal and plant profiles.

Below is a walkthrough of how each step in the process shapes the prompt and improves the output. You can check out this AI-first prototype, where you can try the creation, edit, publish, and unpublish flows.

Write 1–2 sentences to clarify:

  • What the feature does

  • Who it is for

  • What outcome it should achieve.

Follow this format:

It’s a feature for [user] to [do something] so that [out come].

Quickly sketch the key screens and how users move between them.

Outline what each screen needs:

  • Key information (content, data)

  • Actions (buttons)

Outline how the flow behaves:

  • What happens after each action

  • Transitions between screens

Put all the finding together focus on:

  • Feature context (step 1)

  • User flow (Step 2 + 3)

  • Interaction logic (Step 4)

  • Expected outcome

Review the output and adjust:

  • Fix unclear flows

  • Simplify interactions

  • Update prompts by revisiting steps 1–4